How To
Preparations
What you should think through:
- Can I print in a lower scale?
- Could my print be made as a 2D-profile? Use the laser cutter instead!
- Do I have enough time to make this properly?
Get started!
- Book a printer.
- Export your design from Fusion 360 as a STL-file.
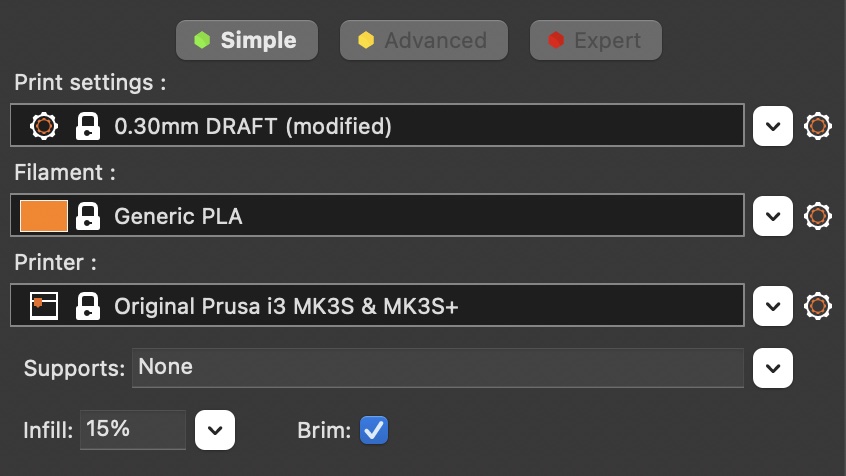
- Open Prusa Slicer.
- Choose the printer “Original Prusa i3 MK3S & MK3S+”
- Upload the STL-files and place them reasonably.
- Choose which surface to place on the bed.
- Make sure every part lays flat on the bed.
- Usually these settings are good for printing:
- Does some parts need support?
- "Support on build plate only": support from bed.
- "For support enforces only": support from a part of the print.
- "Everywhere": a) + b)
- Press the button "Slice now" and look at how it will be printed.
- Export the print as a G-code with file name " firstname number"
Start Printing
Get started!
- Place the file on the memory card and remember to "feed out" the card
- Make sure the filament in the printer i of type PLA
- Do I have enough time to make this properly?
- If the filament is not PLA, remove it from the printer
- This is how you change the filament:
- Press the round button on the printer
- Scroll down the menu on the printer and choose "Unload filament"
- Follow the instructions on the printer
- Scroll down the menu and choose "Autoload filament"
- Follow the instructions on the printer
- You are done!
- Clean the bed with paper and spirit
- Choose "Print from SD-card" and choose your file
During print
Pay attention to your print!
- You have to be oín the room and watch your print during the first layer
- You have to check your print after 30 minutes
- Avoid putting on a print in the evening or late at night
- Clean the bed when you are finished!